Beating bosses in Mortal Shell 2 is no easy feat, especially for some of the later game bosses, or those protecting some seriously impressive items. That’s doubly the case for Warden in Mortal Shell 2, but don’t worry, as hard as he is, we have some pretty easy-to-pull-off strategies that’ll make your life much easier, and by the end of this guide, you’ll not only know exactly what to do, but how to beat Warden easily.
Warden Location in Mortal Shell 2
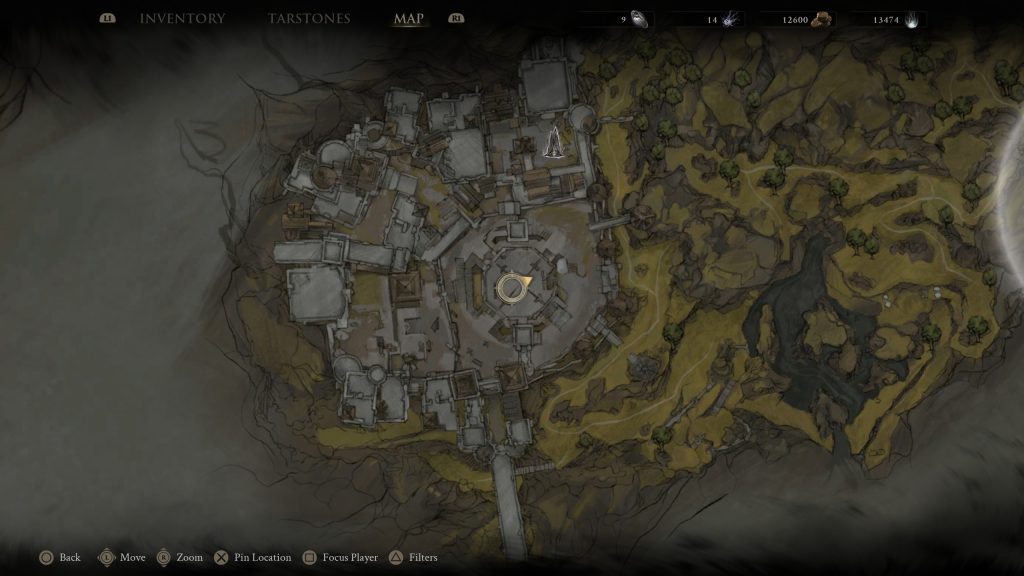
Finding Warden is a lot of work, and there’s every chance you’re here reading this in an attempt to beat him after accidentally walking into him. The first part to getting to Warden is to go to the stone structure just north of the One Legged Wolf beacon on the top right of the map. In this structure, you’ll see a bridge, and on it, an item. Go pick that item up, and you’ll notice the screen go black. Don’t worry, your system isn’t bricked; you’re just being inexplicably teleported all the way across to the top left of the map, to the Citadel of Penance. This is an area that you could not get into previously, thanks to the Portcullis being down and locked. However, now you’re inside it, you can explore, find items, a map (and Ruk), and a particularly difficult boss that’ll have you wondering if he’s possible to beat; spoiler, he is.
Once the screen returns to normal, you’ll find yourself in a cell with a locked door in front of you. Move forward slightly, and the guard outside will attack you, opening the gate and letting you out. I’d heavily suggest you take the time to explore the Citadel of Penance ahead of going to the boss fight, as you’ll have one long trek back if you fail – IGNORE THE WOODEN ELEVATOR. There’s a Beacon inside the Citadel that you’ll want to find and unlock so you can revive there. It’s a few levels above you, and in a courtyard, it’s hard to miss.
One click and you're done. Thank you!
Once you’ve got that Beacon set up, return to the same level of the Citadel as you emerged from, and look for the wooden elevator you no doubt saw earlier, and step onto it. It’ll raise up, and you’ll be presented with a stone arena that couldn’t more obviously be a boss fight. Walk forward, and Warden will jump down.
How to Beat the Warden in Mortal Shell 2
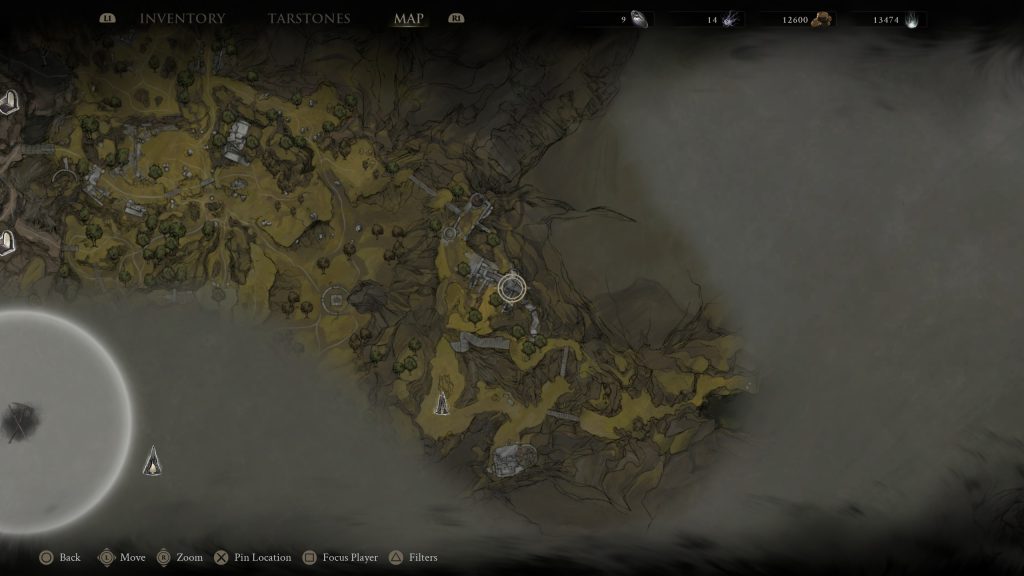
When I say there are bosses that’ll make you question your sanity, Warden is definitely up there for Mortal Shell 2 bosses, but not because he himself is difficult, but because the smaller arena that you’re in proves to make life extremely difficult for you. A huge monster of a man, his weapon swings around and covers what feels like the entire area, and, with every attack being an unblockable combo, you can’t parry or Harden your way out of this.
To understand exactly how to beat Warden in Mortal Shell 2, you’ll need to know my build. At the time of fighting the Warden, I used the following:
- Gragu Shell – Location here.
- Veteran’s Battle Axe – Location here.
- Troubadour Lute.
- Vatra Seal.
- Marksman’s Stone – Increases crit chance of ranged weapons.
- Retribution Stone – Increases Riposte damage.
The main attack the Warden will deploy is a four-or-five-hit combo where he swings his massive weapon in a circle several times. Each one HAS to be dodged, not parried, and if you time it wrong or dodge in the wrong direction, he can still catch you. You’ll be deshelled with as little as two hits, so do your best to avoid. His final hit in the combo will be to slam it to the ground, erupting in fire, so give it a second before attacking him here.
CHEESE METHOD: On one side of the small arena, there are a few environmental obstacles. It can be possible to get him stuck here and you’ll be able to unleash hell on him; however, he will come ‘unstuck’ and return to attacking you quite quickly.
It sounds mad to say, considering the small arena and the huge damage his attacks do, but in between grabbing a hit here and there when you can between his combos, you’ll want to use the Lute on him, preferably from some distance and safety. The Lute will instil Confusion on him, which, when his meter is full due to it, allows you to hit him with a Riposte attack, of which the Retribution Stone you hopefully have equipped will make even more damaging.
Thankfully there’s no second phase or anything constituting a powering up of the Warden, not that that’ll make the full fight any easier for you. Using the above build and techniques on offer will give you a fighting chance, and after that, it comes down to your luck, skill, and how well you can dodge.
Don’t rush off too quickly once you’ve finished, as your next Shell is only meters away, in the very arena we’ve just been fighting in.
For your next read, check out our must-know tips for Mortal Shell 2, or our lengthy review of the game.

Luke Addison is the Founder and Editor-in-Chief of Thumb Wars. Having previously been a part of multiple outlets over the years, including building an entire gaming team from nothing to something, he thought it best to forge his own path and answer only to himself. As likely to be found playing the latest game as he is in the kitchen relaxing (by cooking), he always brings the same bold and brash attitude to everything he does, with a heavy leaning on sarcasm and dry wit!