Last Updated on Aug 4, 2026 @ 12:51:59 PM.
We are now a few bosses into The Relic: First Guardian, with the next one being Mog, The Deserter, and oh boy, are you in trouble here. This guide will help you to figure out the best tactics with how to beat Mog, The Deserter and progress his quest that can be accessed nearby.
Along with us helping you to defeat this boss, we will also help guide you to finding said boss if you haven’t already found them, and even detail the various items you will acquire upon defeating Mog, The Deserter.
One click and you're done. Thank you!
How to Find Mog, The Deserter and His Quest Line in The Relic: First Guardian
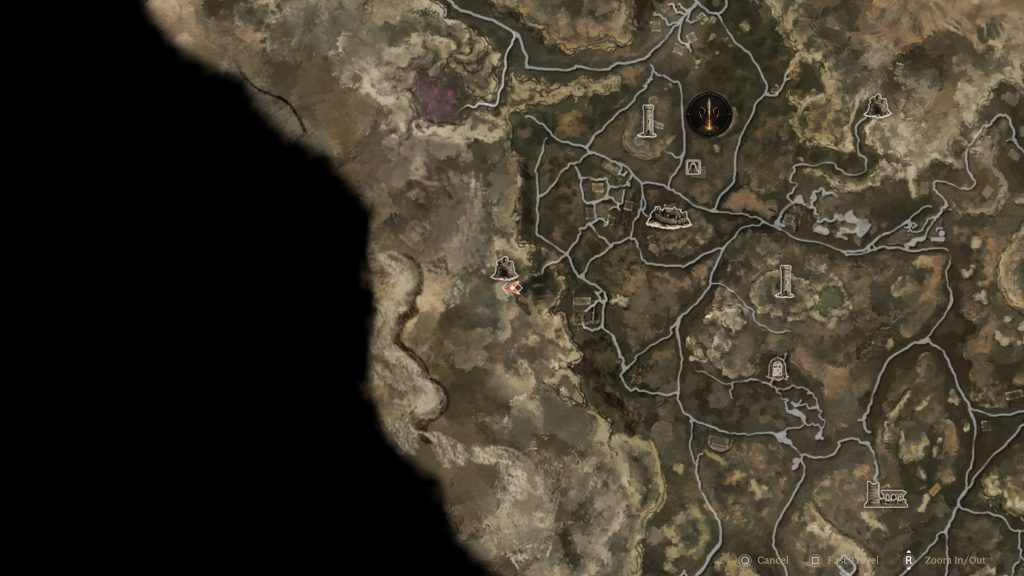
While you are exploring the open world of The Relic: First Guardian, you will eventually come across the Falls of Silence location on the left-hand side of the map. This location is a rather small camp of survivors who are hiding from the dark world on this small hill as they search for a hero called Mog.
Upon entering this camp, you can talk to one of the NPCs located here as they ask you to search for Mog through the event Remnants of Lost Courage. After acquiring this event, players are able to follow a set of clues throughout the camp that lead them through a small archway into a small pool and a waterfall.
Once you clear out some enemies within the small pool, your instincts would direct you to walk into the waterfall, and they would be correct, as this is the entrance to the cave that mog resides in. As you progress through the cave, you will eventually drop down into a room with two glowing enemies kneeling within.
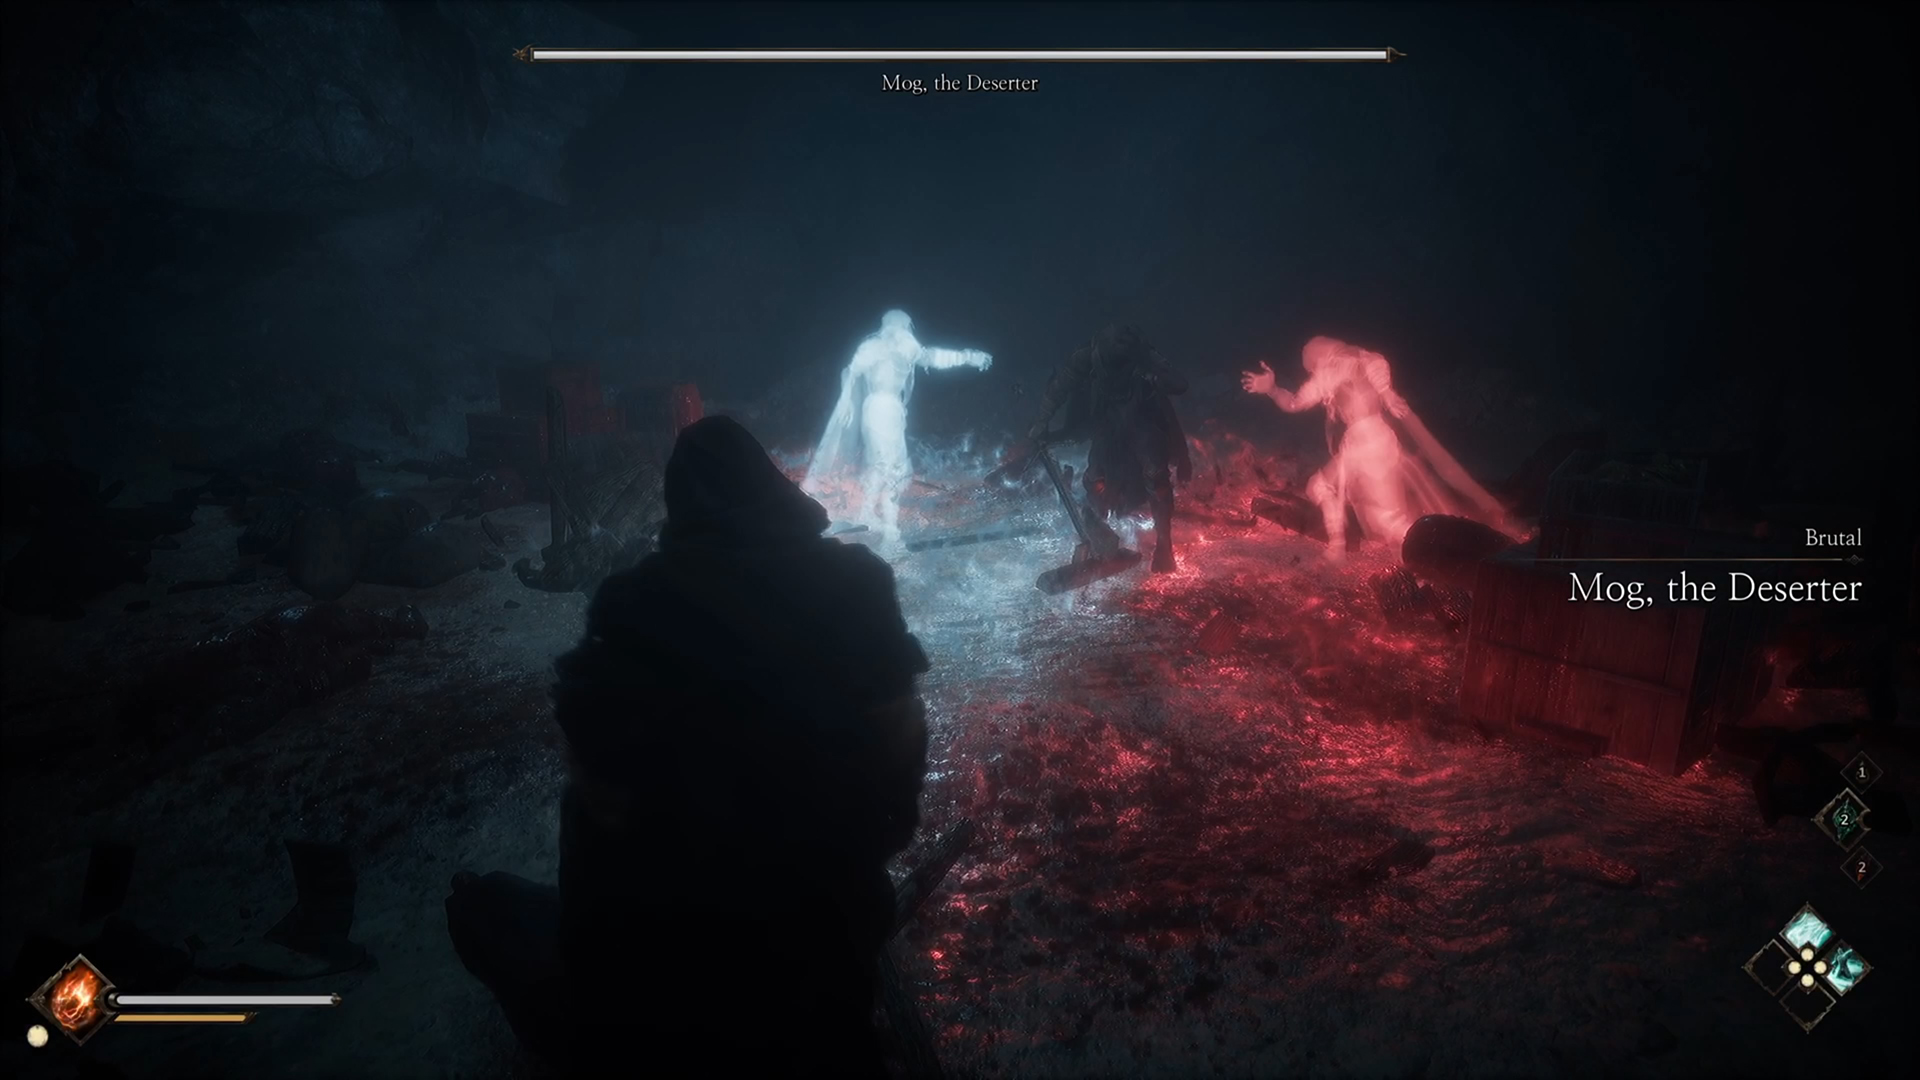
One of these enemies will be red, and one will be white; it doesn’t matter which one you interact with first, but once you interact with them, they will attack you, teasing some of the attacks that the boss will use further down the line. After beating both spirits, a wall will explode, leading you to Mog, The Deserter, and his boss room.
How to Beat Mog, The Deserter and Complete His Quest Line
Once you trigger Mog, The Deserter and his boss fight, you will notice that he has two spirits next to him, again one white and one red, which Mog will then attack and absorb, starting the fight. Because Mog, The Deserter absorbs and attacks the two spirits, he begins to embody their attacks throughout the boss fight but with a few minor changes to make them challenging to beat.
After fighting some of the earlier bosses, Mog, The Deserter might come as a shocking encounter to you, as Mog relies quite heavily on fast attacks and unrelenting combos. Because of this, we would recommend that players rely on parrying rather than dodging, as the constant attacks can’t all be avoided so easily.
When you first encounter Mog, The Deserter in his boss room, he will begin by using small combos to allow the player to get used to his speed and attack patterns. The two main attacks that Mog will use during the beginning of the fight will be one in which he jumps towards the player, slashing his sword in a large arc, leaving his back exposed to the player. If you parry this attack, there is a small opportunity to fight back.
The other attack that Mog will utilize during the early stages of the fight is that he will run towards the player holding his hand out, which is enveloped in a red flame, as he uses his hand to slash at the player before he dodges away and does another charging slash attack towards the player.
After you get Mog, The Deserter to roughly 60%-50% health, he will begin to get a lot more aggressive as the attacks get slightly faster and a lot more frequent. Now that Mog has reached this health limit, he will begin using longer combos. The main combo that he will begin to use will last roughly 6 attacks, in which Mog begins by slashing his sword twice, following up rapidly by a slash with his hand, then another sword slash, finally ending with one final hand slash before dodging away to do his rushing slash attack from the last combo.
As much as parrying this combo is very important to your survival, if you attempt to simply block the moves without getting perfect parries, you will be at a high level of risk, as once Mog breaks your stamina during this long combo, stunning you, he will begin charging up an unblockable attack that can deal some devastating damage.
UPCOMING BOSSES
Normally in these guides we would recommend using the fire barrels within the arena to get free damage on the boss; however, when it comes to Mog, The Deserter, this could be a huge risk for the player, as Mog moves around too fast to stay in the fire long enough to gather the burn status, and instead he can maneuver you, the player, into entering the fire and damaging yourself.
Although Mog, The Deserter, is very fast, he is also very low in armor, meaning that he takes a lot of damage rather quickly, especially from skills, so even though the openings for attacks may be small, if you can take advantage of those opportunities, you can deal damage fast. This can be especially powerful once you break Mog’s stance as well, which is relatively easy by parrying his numerous attacks.
Once you have defeated Mog, The Deserter, you will be able to claim your rewards from defeating him as well as finishing his quest by returning to the small camp at the Falls of Silence. The rewards you will be granted from Mog are:
- His outfit – Shroud of Cowardly Survival
- Mog’s Remains
- Mog, The Deserter Lore
- Relic Energy
After beating Mog, you will be able to head out of his boss room and climb some ladders, but before you leave, there is a small drop at the top of both ladders to a hidden chest. After obtaining this chest, you can head back up the ladders for a second time and follow the tunnel out of the cave. Once you are out of the cave, you can turn left and return to the camp to turn in Mog’s quest and earn your loot.
For your next read, check out our review for The Relic: First Guardian or our tips for making the game a breeze.

Liam is a Senior Editor, Writer, and Critic for Thumb Wars and has been working with the team since day one. Liam is a big fan of all things gaming, as you will catch him playing all of the new releases from every genre you can imagine. Whether you find Liam gaming just for fun or spending his free time streaming, you will always find a smile on his face when it comes to all things gaming.